Last updated on 2025-10-22 | Edit this page
Setup Overview
These steps prepare your computer for the workshop.
They work on Windows, macOS, and Linux — look for tabs
marked
🪟 Windows only or 🐧 macOS/Linux only where steps
differ.
We’ll use Visual Studio Code (VS Code) as our workspace and terminal.
Step 1 Install Visual Studio Code
Download and install VS Code:
👉 https://code.visualstudio.com/Download
After installation, open VS Code once to complete setup.
What to expect
You should see the Welcome screen with “Start” and
“Extensions.”
If you’re on Windows, open VS Code as your regular user (not
Administrator) so extensions install correctly.

Step 2 Install Git
Step 3 Add Helpful VS Code Extensions
From the View → Extensions menu (or press
Ctrl+Shift+X / Cmd+Shift+X), search for and
install these:
-
Python (by Microsoft) – enables Python coding and
linting
-
GitLens – shows Git history and collaboration
tools
-
Git Graph – visualizes branches and commits
-
Excel Viewer – view CSV and Excel files
-
JSON Editor – makes JSON files easier to read
- 🪟 Start git-bash – enables Git Bash inside VS Code (Windows only)

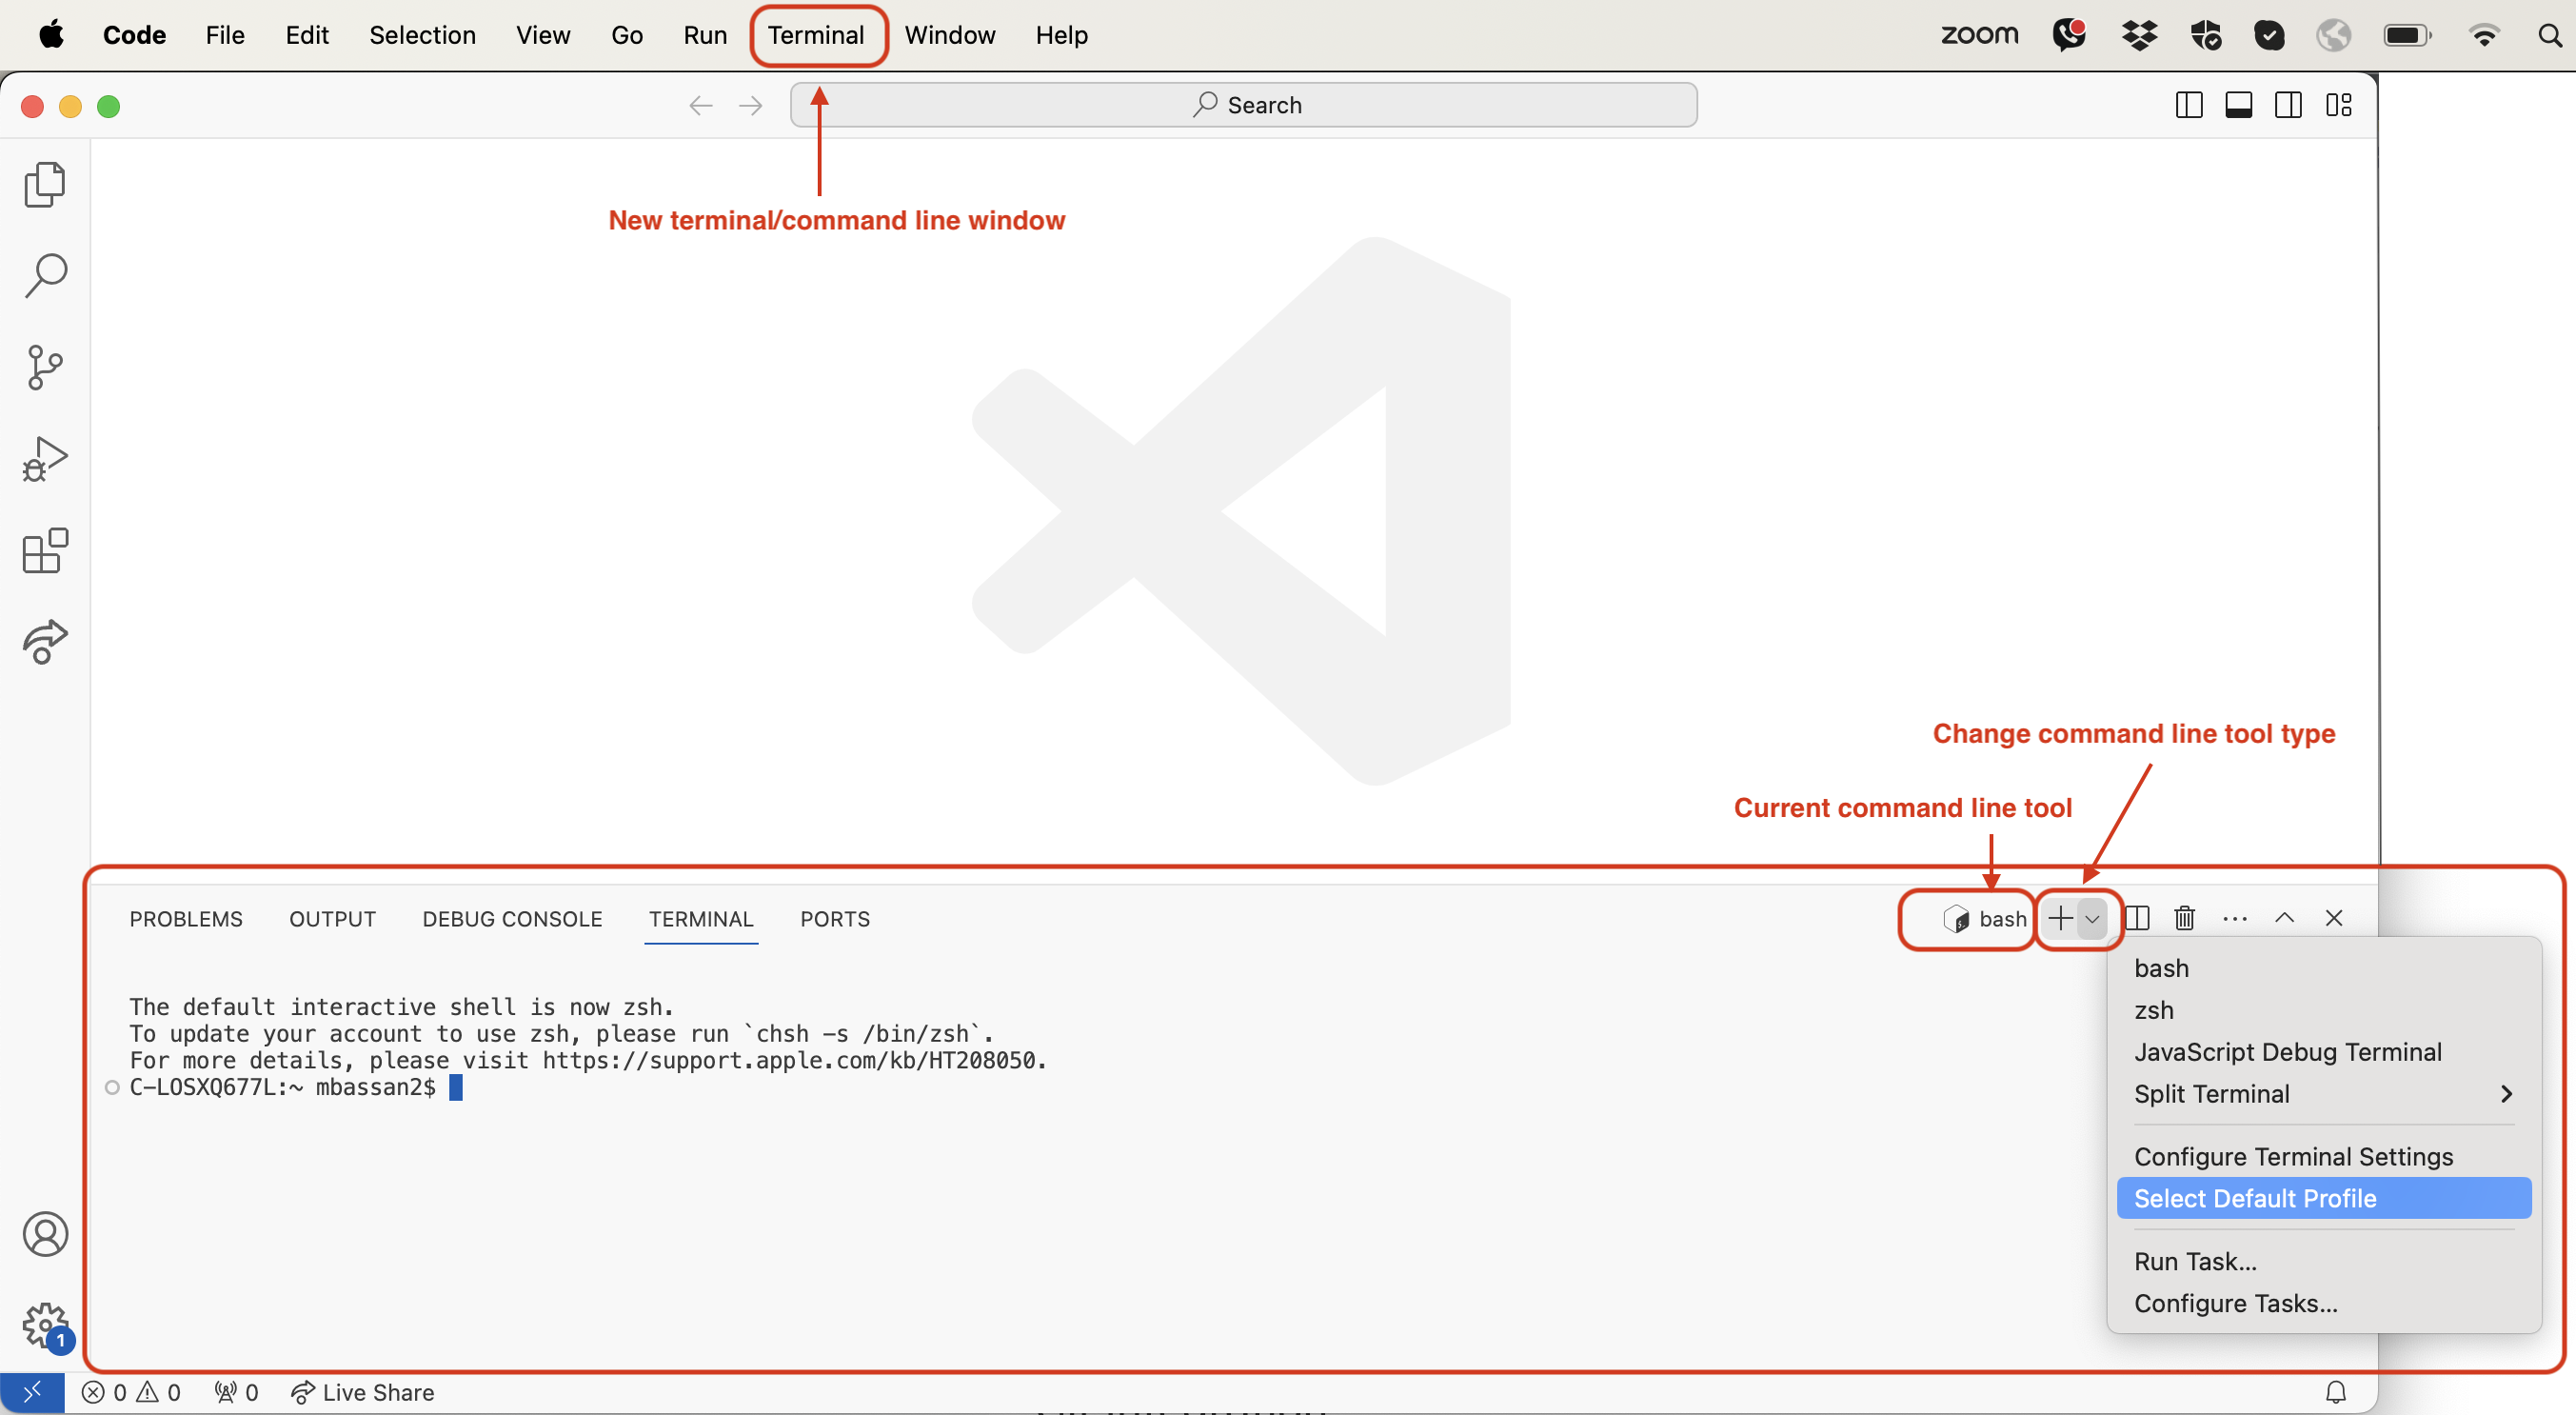
Step 4 Check Terminal and Git
Step 5 Install Python using uv
We use uv to install Python and manage project environments automatically.
Run this in your VS Code terminal:
When it finishes, close and restart VS Code, then verify:
🪟 Windows tip
You don’t need PowerShell or separate installers — everything runs
inside VS Code’s Git Bash.
If uv isn’t found, close and reopen VS Code to refresh your
PATH.

Step 6 Download Course Files
Download the practice data:
👉 https://github.com/carpentries-incubator/better-research-software/raw/refs/heads/main/learners/spacewalks.zip
Unzip spacewalks.zip to an easy location (e.g.,
Desktop).
In VS Code, open the folder (File → Open Folder…) to
view its files.

Step 7 Set up Your Project Environment
In the VS Code terminal:
Edit the new pyproject.toml so it looks like this:
Then install and run:
Test your setup
If you see a plot or printed output, everything works!
🪟 If Windows Defender Firewall prompts you, you can safely allow
access.

Step 8 Connect to GitHub
Create your GitHub account
- Go to https://github.com/signup and create a free account.
- Verify your email before continuing.
- Keep your username and password handy — you will sign in through your browser once.
Why we use HTTPS
GitHub now recommends browser-based sign-in instead of SSH keys or manual tokens. This uses the Git Credential Manager (GCM), which securely remembers your login in your operating system’s keychain.
1. Check your Git configuration
git config --global user.name "Your Name"
git config --global user.email "your.email@example.com"
These identify you in Git commits.
3. Create a test repository on GitHub
- Visit https://github.com/new
- Name it
test-repo - Choose Public and click Create repository
You will see the repository page with command-line instructions.
4. Connect from VS Code or Terminal
git init
git add .
git commit -m "first commit"
git branch -M main
git remote add origin https://github.com/YOUR-USERNAME/test-repo.git
git push -u origin main
When you run the last command, Git opens a browser window asking you to sign in to GitHub. Once signed in, the push completes. No SSH keys or tokens required. Your credentials are stored securely and reused automatically.
A note on GitHub authentication changes
Older tutorials often tell you to set up SSH keys or create Personal Access Tokens (PATs). That is no longer required for most users.
Today, GitHub supports secure, one-time browser authentication through Git Credential Manager. • Installed automatically on Windows. • Installable on macOS and Linux as shown above.
When you push for the first time, Git opens a browser window for you to sign in and stores your credentials securely in the system keychain.
- All learners must have Git, VS Code, and Python installed before the workshop.
- Git Credential Manager enables secure browser-based authentication with GitHub.
- Verify your setup by running
git --version,python --version, and pushing to a test GitHub repo.